How to Turn a Picture into Pixel Art (Free, Step by Step)
Turning a photo into pixel art means redrawing it as a grid of large, square blocks, usually with a limited set of colors, so it looks like graphics from an old video game. People do it for retro avatars, game sprites, Minecraft builds, cross-stitch and bead patterns, or just for fun.
This guide explains what makes a good source photo, the settings that matter most, how to do it in an image editor or by hand, and how a converter app compares. It ends with how to turn a picture into pixel art in Dotcam.
1. Choose a photo that will pixelate well
Pixel art throws away detail, so start with a picture whose main shape is clear:
- One clear subject, such as a face, a pet or a building, rather than a busy scene.
- Good contrast between the subject and the background.
- Simple, even lighting. Strong shadows can turn into blotches.
- Crop tightly around the subject before converting.
2. The settings that matter
Pixel size
This is how many original pixels become one block. Small blocks keep more detail but look less like pixel art; large blocks give a chunky, iconic look but lose features. For faces, try sizes where the eyes are still two or three blocks wide.
Number of colors
Old consoles could only show a few colors at once, which is a big part of the look. Reducing a photo to somewhere between 8 and 32 colors often looks convincingly retro; 2 to 4 colors gives a bold, graphic style.
Dithering
With few colors, dithering mixes the remaining colors in dot patterns to suggest in-between shades. It keeps gradients smoother but adds texture. See what is dithering in pixel art.
Grid lines and filters
Thin lines between blocks make the result look like tiles or a stitch chart. Filters such as monochrome or a green handheld-console palette add a particular retro feel.
Option A: an image editor
Most image editors can do a basic conversion. The general approach:
- Crop the photo around the subject.
- Resize the image down to a small size, for example 64 pixels wide.
- Reduce the colors, using the editor's indexed color or posterize option, with or without dithering.
- Resize back up by a whole-number factor using nearest-neighbor resampling, so each pixel becomes a crisp square instead of a blur.
- Export as PNG, which keeps the hard edges. JPEG adds blurry artifacts.
Image editors give full control and let you hand-correct individual pixels, but there are several steps to learn, and the exact menu names differ between programs.
Option B: draw it by hand
Pixel artists often trace a photo on a low-resolution canvas in a pixel art editor, placing each pixel themselves. This gives the cleanest, most stylised results, with outlines and chosen colors, but it takes far longer and needs practice. A common middle path is to convert automatically first, then tidy the result by hand.
Option C: a converter app
A pixel art converter does the resizing, color reduction and upscaling in one go, with sliders to try different looks quickly. It is the fastest way to get a good result from a photo. It will not add hand-drawn touches like clean outlines, and an online tool that uploads photos to a server may not suit private pictures, so check how a tool handles your image.
3. Clean up and save
- Compare with the original side by side. If key features have disappeared, reduce the pixel size or add colors.
- Stray single pixels of an odd color can be removed in an editor.
- Save as PNG to keep edges sharp.
- For Minecraft builds or bead and stitch patterns, a visible grid makes counting blocks much easier.
Turning a picture into pixel art with Dotcam
Dotcam handles the whole process in your browser or on your phone.
- Tap Select from Gallery to choose a photo. On phones, Take Photo may open the camera or the photo picker, depending on your device.
- Press Generate Pixel Art, or turn on Auto Process on Selection in Settings to convert as soon as you pick an image.
- In Basic Settings, move the Pixel Size slider from 2 to 30.
- Turn on Reduce Colors and choose 2 to 64 colors. Switch on Dithering to blend between them.
- Optionally enable Show Gridlines with your choice of width and color, set a background color, or pick a filter: Sepia, Monochrome, Invert Colors, Vaporwave, Gameboy, Blueprint, Scanlines or CRT Display.
- Try a preset such as 8-bit Retro, Gameboy, Grid Display, Blueprint or Vaporwave, or save your own.
- Switch between the Original and Pixel Art tabs to compare, using Undo and Redo as you experiment, then download the PNG.
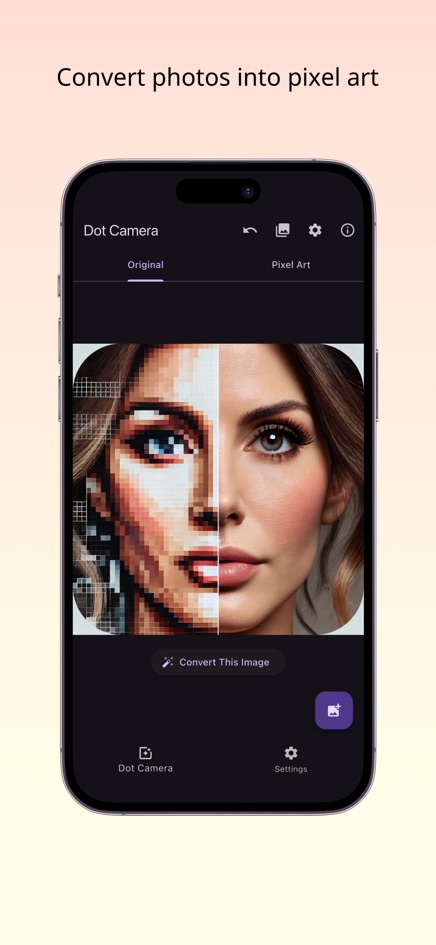
In the web version, the conversion runs in your browser and photos are not uploaded. The iPhone and Android apps save results to your photo library and keep an in-app gallery.
Frequently asked questions
What pixel size should I use for a portrait?
Start in the middle of the range and adjust until the eyes and mouth are still recognisable. Larger blocks look more retro but lose features.
Why does my pixel art look blurry when enlarged?
It was probably scaled with smooth resampling or saved as JPEG. Use nearest-neighbor scaling and save as PNG.
How many colors does pixel art use?
There is no fixed rule. Many retro styles use a small palette, often 4 to 32 colors.
Can I use the result as a Minecraft or bead pattern?
Yes, as a guide. A larger pixel size and grid lines make blocks easy to count.
Does Dotcam upload my photos?
No. In the web version, the conversion runs inside your browser and the result downloads straight to your device.